The Invisible Scaffolding Why I Finally Stopped Paying For A Family That Only Loved My Usefulness

The Night I Realized I Was Never a Daughter—Just the One Who Paid
The moment didn’t come with shouting or slammed doors. It came quietly—with the soft thud of two worn sleeping bags hitting a hardwood floor.
My mother had just tossed them toward my children.
Across the hall, my sister’s kids were already tucked into warm guest beds.
And just like that, everything I had been trying not to see for twenty-nine years finally became impossible to ignore. It wasn’t about where my kids were sleeping. It was about what I had always been in that family—a support system, not a daughter.
The Cost of Being “The Strong One”
To understand why that moment broke me, you have to understand the four years that came before it.
When my father passed away, he left behind more than grief. There was a mortgage—$1,850 a month—that my mother couldn’t afford. My sister, Ashley, was going through yet another crisis. She was fragile, overwhelmed, and somehow always exempt.
I was the stable one.
So I stepped in.
For forty-eight months, I quietly held everything together.
- I paid the mortgage—every single month.
- Covered her $340 insurance premiums.
- Put $4,200 for a furnace repair on my credit card.
- Spent $8,500 renovating her kitchen—on my own time.
- Paid $280 a month for my niece’s gymnastics.
In total, I gave more than $124,000.
And still, I wasn’t treated like I belonged.
The Thanksgiving That Changed Everything
That Thanksgiving, I arrived hopeful.
I brought my father’s favorite pumpkin pie. A beautiful linen tablecloth. I didn’t bring up the money—I never did. I just wanted to feel like part of the family.
But the signs were already there.
Five hooks in the hallway—for my mother, my sister, and her kids.
Our coats? Draped over the banister.
After dinner, I cleaned while Ashley rested her “aching back.” Later, she happily posed in the kitchen I had paid for—posting it online as if it were hers.
Still, I said nothing.
Until bedtime.
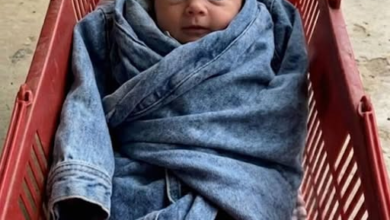
The Sleeping Bags
At 8:30, when my children were exhausted, my mother explained that moving Ashley’s kids would “disrupt their routine.”
Then she pulled out the sleeping bags.
Thin. Musty. Forgotten.
She tossed them toward my six-year-old son.
Ashley stood nearby, smiling, and casually suggested we should’ve “booked a hotel.”
That’s when it hit me.
Not anger.
Clarity.
Breaking the Pattern
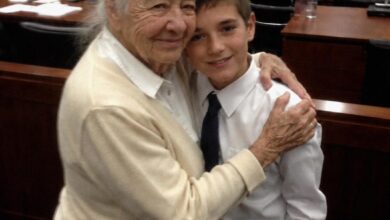
I looked at my son—quiet, observant, already learning the same lesson I had learned as a child:
Some people get comfort.
Others are told to be strong enough without it.
I knelt down and told him to pack.
We left.
My mother called me dramatic. Said it was just one night.
But it was never just one night.
The Morning I Took My Life Back
The next morning, while the world chased Black Friday deals, I sat at my kitchen table and started undoing four years of silent sacrifice.
- I canceled the mortgage payments.
- Removed myself from her insurance.
- Stopped the roof deposit.
- Pulled my credit card from every shared expense.
Within hours, I reclaimed $2,470 a month.
Money that belonged to my own children.
Their Reaction Said Everything
My mother called it a “glitch.”
Ashley texted, asking if I had “forgotten” to update my card.
Not once did anyone ask why.
Not once did anyone ask if I was okay.
Because to them, I wasn’t a person.
I was a resource.
The Conversation That Ended It
When I finally sat down with my mother, I brought proof—pages of bank statements, every dollar highlighted.
$124,520.
I told her the truth she had ignored for years:
My father was right—the house doesn’t hold itself up.
But she never noticed who had been holding it.
Then I gave her a choice.
Ashley could start contributing.
Or she could downsize.
But I was done being the invisible foundation.
What I Have Now
Our home isn’t perfect.
We don’t have a designer kitchen or extra rooms.
But every person here has a bed.
We have new sleeping bags now—soft, warm, covered in silver stars. We use them for camping trips, not as substitutes for care.
And for the first time, I understand something my father meant all along:
The house I was meant to protect…
was never the one I was paying for.
It was the one I built with my husband and my children.
And this one?
This one stands strong—
not because of guilt or obligation…
but because it’s built on real love.